If you're like me, you know that there's something truly magical about surrounding yourself with memories of your adventures around the world. Instead of letting your travel experiences fade away into the digital abyss, why not bring them to life in your home? Welcome to a comprehensive guide on how to curate your very own travel gallery wall—a space where each photo tells a story and every corner radiates with wanderlust.
Step 1: Planning Your Travel Gallery Wall
Before we dive into the details, let's take a moment to plan our course. Find a blank canvas—a wall eager to be transformed into a gallery of your most cherished travel memories. Close your eyes and envision the atmosphere you want to create. Are you drawn to the serene blues of a coastal retreat or the vibrant energy of a bustling cityscape? Let your imagination run wild as you dream up the perfect backdrop for your adventures.
Step 2: Gathering Inspiration
Now that you have a vision in mind, it's time to seek inspiration. Grab a cup of your favorite beverage (coffee, tea, or perhaps something stronger—it's all part of the creative process), and dive into the world of travel-themed decor.
Start by exploring the vast realm of inspiration available online, including popular platforms like Pinterest. Here, you can find a plethora of curated boards showcasing various travel-themed decor ideas. Scroll through different pins and boards, from rustic farmhouse chic to sleek urban elegance, to discover styles that resonate with your vision for your gallery wall.
But why confine yourself to just the online world? Take a step into the tangible world of travel magazines and vintage postcards. With each turn of the page, immerse yourself in the rich colors and captivating compositions. Let the images spark your imagination and fuel your creativity as you explore different styles and themes.
As you gather inspiration from these various sources, don't be afraid to let your imagination run wild. Take note of colors that resonate with you, themes that speak to your soul, and motifs that transport you back to your most cherished memories. Embrace the serendipity of discovery as you stumble upon unexpected treasures, each one adding depth and richness to your vision.

Step 3: Selecting and Printing Photos
Ah, the heart and soul of any travel gallery wall—the photos! Take a stroll down memory lane as you sift through your digital archives, selecting the snapshots that transport you back to those unforgettable moments. When it comes to printing, quality is paramount. You want your photos to shine, capturing every nuance of your adventures. Consider investing in professional printing services for that extra touch of elegance and precision.
Step 4: Incorporating Travel Posters
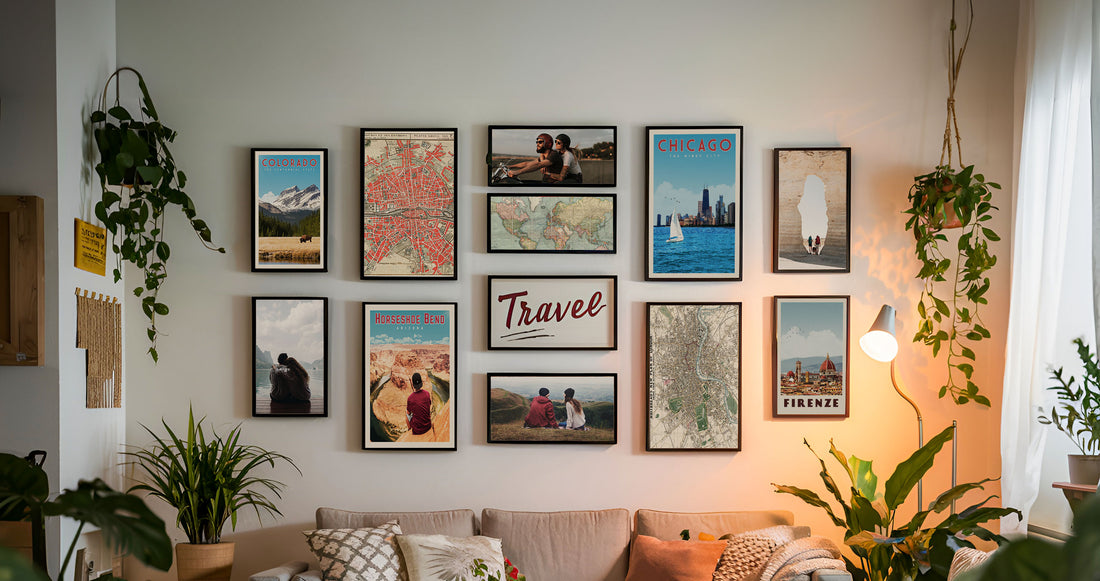
But wait, there's more to this gallery wall adventure! No travel-inspired space is complete without the timeless allure of travel posters. These iconic artworks add depth, character, and a touch of nostalgia to your display. Whether you're drawn to vintage-inspired designs or modern minimalist prints, there's a poster out there waiting to join your wall of wonders. Mix and match with your photos to create a dynamic tableau that sparks conversation and fuels your wanderlust.

If you're looking to add a truly personal touch to your gallery wall, consider turning your travel photos into vintage-style custom travel posters. Imagine your favorite memories transformed into works of art that evoke the golden age of travel, complete with weathered textures and retro typography. Each poster is meticulously crafted to capture the essence of your adventures, making it a one-of-a-kind centerpiece for your gallery wall. Simply provide your photos, and let us work our magic to create a custom piece that celebrates your unique journey in style. It's the perfect way to elevate your space while adding just the right mix of art and personality.

Step 5: Choosing Frames and Arranging Photos
Now comes the exciting part—framing and arranging your photos to weave together the narrative of your adventures. Head to your local craft store and explore the array of frames available, from rustic wood to sleek metal and chic acrylic. Remember, cohesion is key, so aim for a unified look that ties your gallery wall together harmoniously.
But before you settle on a final arrangement, why not have a little fun with it? Lay out your frames and photos on the floor to experiment with different layouts. Play with the placement until you find a configuration that resonates with you. Alternatively, use pieces of craft paper and tape to mock up the arrangement directly on the wall. This allows you to visualize how the gallery wall will occupy space and make adjustments accordingly.
Embrace the process of exploration, trying out various layouts that strike a balance between symmetry and spontaneity. By allowing yourself to experiment and play with different arrangements, you'll discover the perfect composition that beautifully showcases your adventures.
Step 6: Adding Personal Touches
Now that the framework of your gallery wall is established, it's time to infuse it with your unique personality. Dust off those ticket stubs, maps, and souvenirs hiding in your drawers—they're about to shine. Consider framing some meaningful ticket stubs in a whimsical collage, reminiscent of a scrapbook page come to life. Or, use vintage-inspired frames to give your maps a touch of old-world charm, turning them into captivating conversation pieces. As for your souvenirs, hang them from decorative hooks or arrange them in shadow boxes for a three-dimensional effect. These personal touches add layers of meaning and authenticity to your display, transforming it from a simple decoration into a heartfelt tribute to your adventures.

Photo Source: Hunter Premo
Step 7: Hanging and Final Touches
With your photos, frames, and personal touches at the ready, it's time to bring your vision to life. Roll up your sleeves, grab your trusty hammer and nails (or perhaps a handy adhesive hook), and start hanging those masterpieces with care. Step back from time to time to admire your handiwork, making any necessary adjustments until everything feels just right. And remember, there's beauty in imperfection—so embrace the process and let your creativity shine.
Step 8: Maintenance and Enjoyment
As with any journey, your travel gallery wall requires a bit of upkeep to keep it looking its best. Dust off those frames regularly, and don't hesitate to rearrange your display to keep things fresh and exciting. But above all, take the time to savor the memories and stories that adorn your walls. Let each photo and trinket transport you to another time and place, reminding you of the incredible adventures that have shaped you into the person you are today.
Final Thoughts
And there you have it —a comprehensive guide to creating your very own travel gallery wall masterpiece. So dust off those photos, unleash your creativity, and let your wanderlust guide you as you embark on this exciting journey. With a bit of imagination and a whole lot of heart, you can transform any wall into a portal to the world—a space where your travels come to life in vivid color and endless possibility. Here's to the memories, the adventures, and the walls that tell our stories. Happy decorating, my friends!